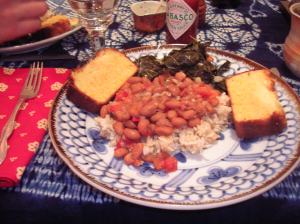
I overheard a mom asking her toddler about the planting time of bean seeds when I was at our local natural grocery. As I passed by, I blurted out the answer; and a conversation ensued which traversed gardening, cooking
greens, and longing for access to those doggone great Tailgate Markets greens. When the Tailgate Markets do open, greens will be one of the first veggies available.
“Greens” came up repeatedly in conversation all week…how to cook them, when to plant them, and what kind to plant. If you were raised in the south, you know about greens. Even if you didn’t like them as a kid (I didn’t), hopefully you outgrew that stage. Now I crave the satisfying taste of greens.
It’s no wonder, since greens are power-packed with vitamins and minerals – Vitamins A, C, E, and K, plus Folic Acid, Iron, Calcium, and Omega-3 Fatty Acids, and they are a source of fiber. When I googled to get the facts, dark leafy-greens eaten once a day were reputed to reduce the risk of cardiovascular disease by 11 %, the risk of diabetes by 9%, the risk of hip fracture in middle-aged women by 45%, to help protect the eyes from cataracts and macular degeneration, and to help prevent or reduce the risk of many downright scary cancers. I knew they were good for you, but wow, they’re actually a wonderfood. The south rocks! After getting the lowdown on the benefits of greens, I was ready to eat some more greens that very minute.
Here’s how I cook them. It’s simple and delicious:
Ruth’s Favorite Greens
Olive Oil, or other fat source
½ Onion, chopped
Greens, 1 Bunch*
Salt to taste…I don’t add much
Water
*You probably want to double this, as one bunch barely feeds 3 people.
Prep: Wash greens thoroughly, making sure you have washed off ALL the grit. It likes to hide in the ruffles of kale. Sometimes it works best to fill a deep bowl with water, submerge each leaf in the water, and swish it around until you are confident that no grit remains. Remove the leaf from the ribs (thick stems), and compost the stems. Tear the greens up into smaller pieces.
Heat a generous amount of olive oil in a big pot – a big pot because you will need room for the raw greens before they cook down. Sauté onions in the olive oil until onions are clear. Add greens a little at a time, stirring with each addition to ensure that the greens are coated with olive oil. When you have added all the greens, add about ¾ inch of water (less if you are super-attentive, more if you have 3 other things going + kids). Cover the pot with a tight-fitting lid and turn down.
Let it cook about ½ hour or so until desired tenderness is reached, stirring
occasionally. Check all along to make sure the water hasn’t disappeared, or the greens will burn. If, at the end of cooking, there is still some liquid in the pot, save it and drink it. This liquid is called “pot likker” (liquor?) by southerners, and is rich with nutrients.
Interesting additions include: Roasted red peppers, sun-dried tomatoes, vinegar – including artisan balsamic vinegar, pepper-vinegar, Tabasco, turnips, nuts, dandelion greens, gomasio…meat-eaters might substitute bacon grease for olive oil, and add some kind of pork.
More:
- Since some of the vitamins are fat-soluble, the olive oil is a health benefit.
- For the highest vitamin content, use mixed greens (like collards, kale, mustard, turnip greens, and dandelion greens).
- Freeze leftover greens in a Ziploc bag, for a quickie vitamin lift when you are in a hurry.


